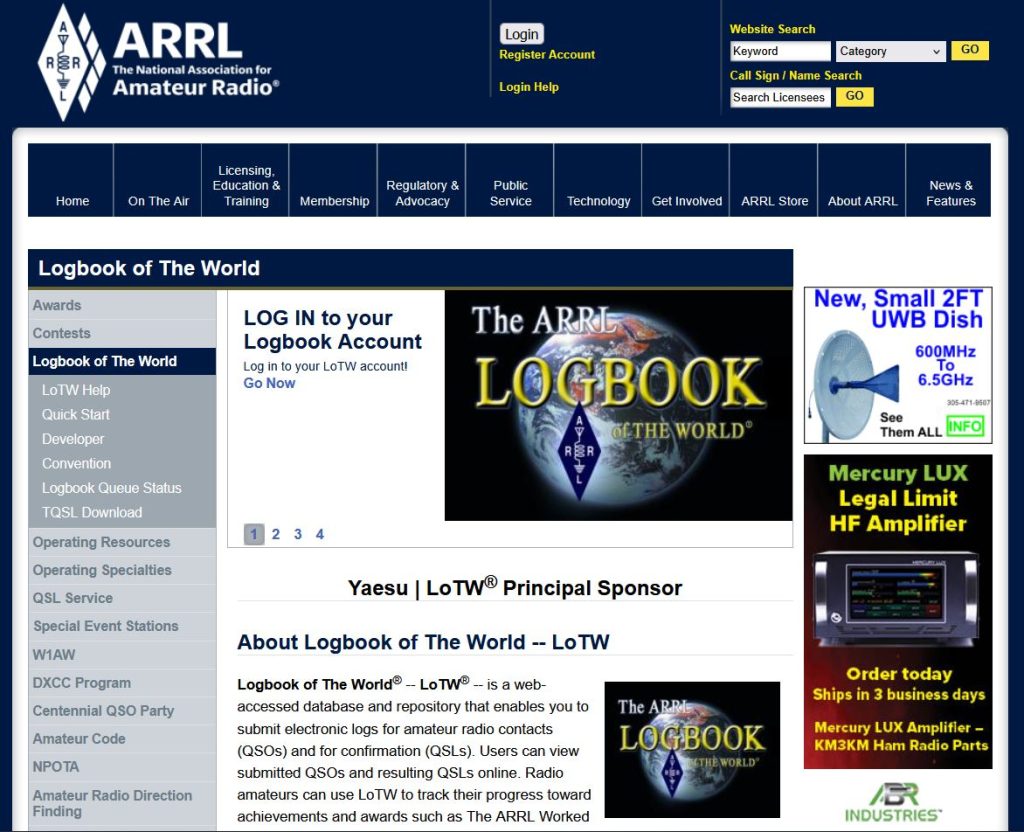
Just a quick post to share that all QSOs from VP2V/KK4LWR have been uploaded to ARRL Logbook of the World. Not a LotW user? Get started here!
At the time of writing, already 434 QSOs are confirmed!
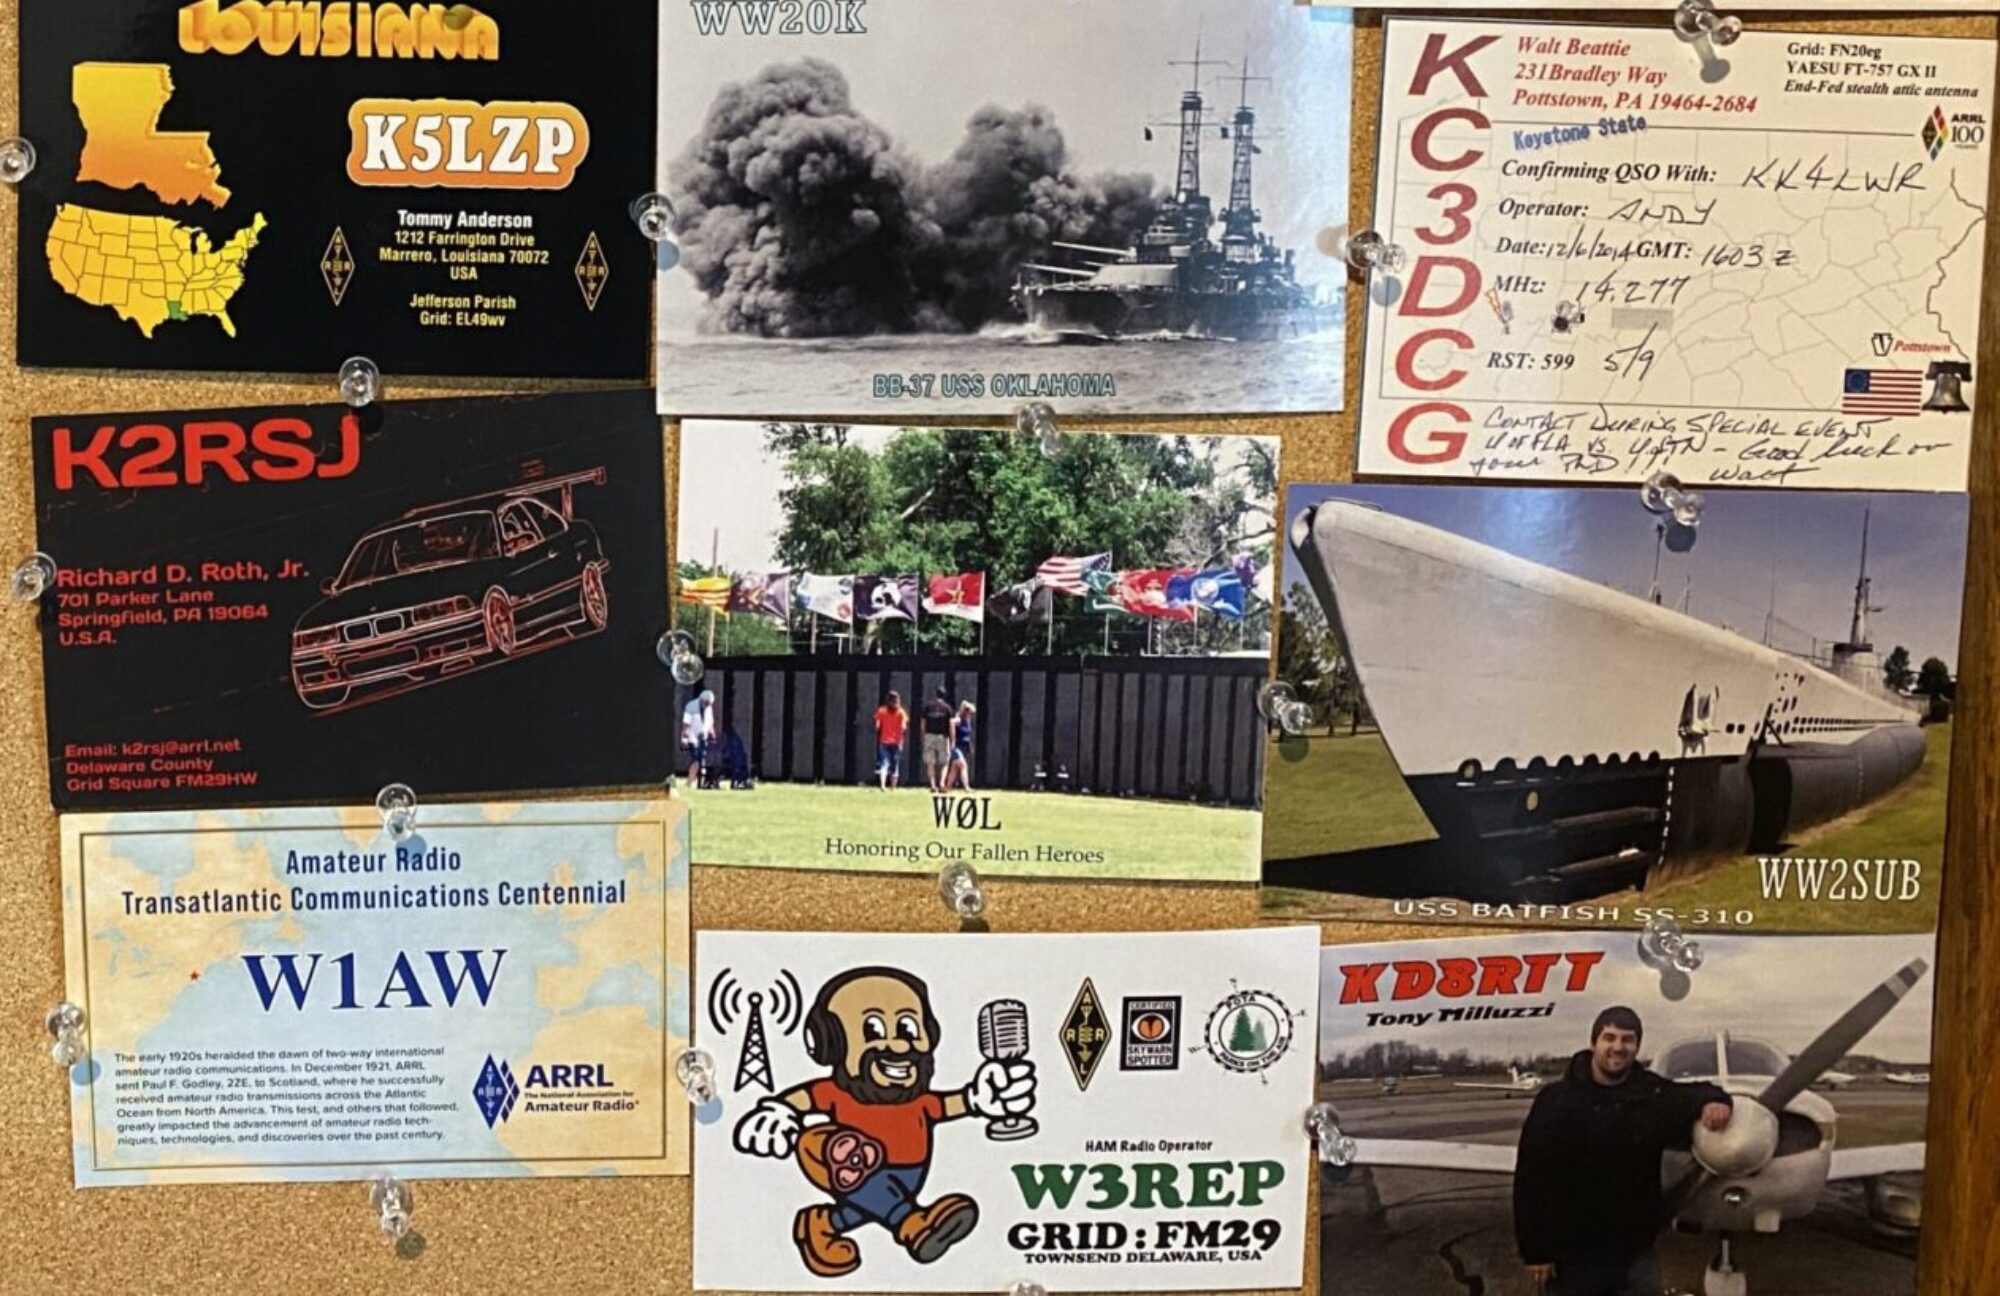
We will be processing paper QSOs in September. If you plan to QSL direct or wish to get a special joint QSL from me and Tony, remember to SASE and them them in soon!
Tony and I were up early to work the HamSCI Meteor Scatter QSO Party. While neither of us were successful in any QSOs, we did hear a few stations and that data was fed to PSK Reporter to help with the research.
We are now working bands as they open. Right now its been FT8 as there has been little to no CW returns after calling CQ for a bit. No one likes Monday mornings. We get it. Tony is bouncing between 6 and 30 meters. Catch us while you can. Our flight is out later this afternoon and we plan operate as long as we can, on the air until noon or so.
At the time of writing, we are less than 50 QSOs off our goal of 1000! Considering our focus on the less popular bands and a lot of effort for SSB, we are very happy with how things are shaping up.
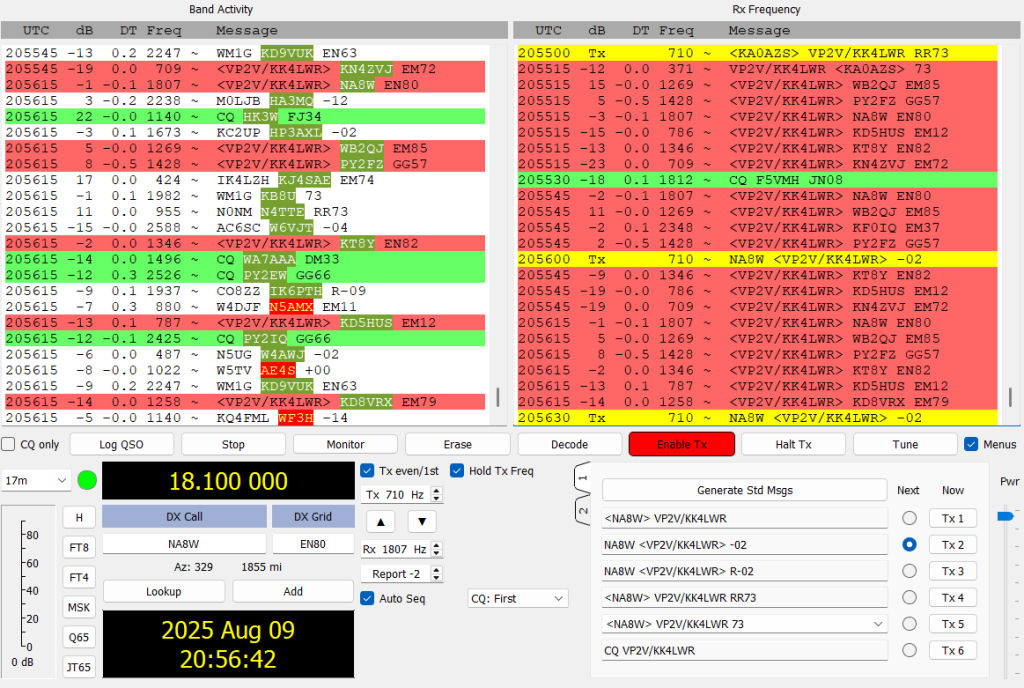
The bands came to life this afternoon and I was able to work a small pileup on 17 meters. I’ve spent over 50% of my time on 17 meters, sticking to our original plan. I hope we were able to help folks out! I was able to make a few CW contacts, but it has been hard due to the contest this weekend.
IMG_20250810_165718_021.jpg
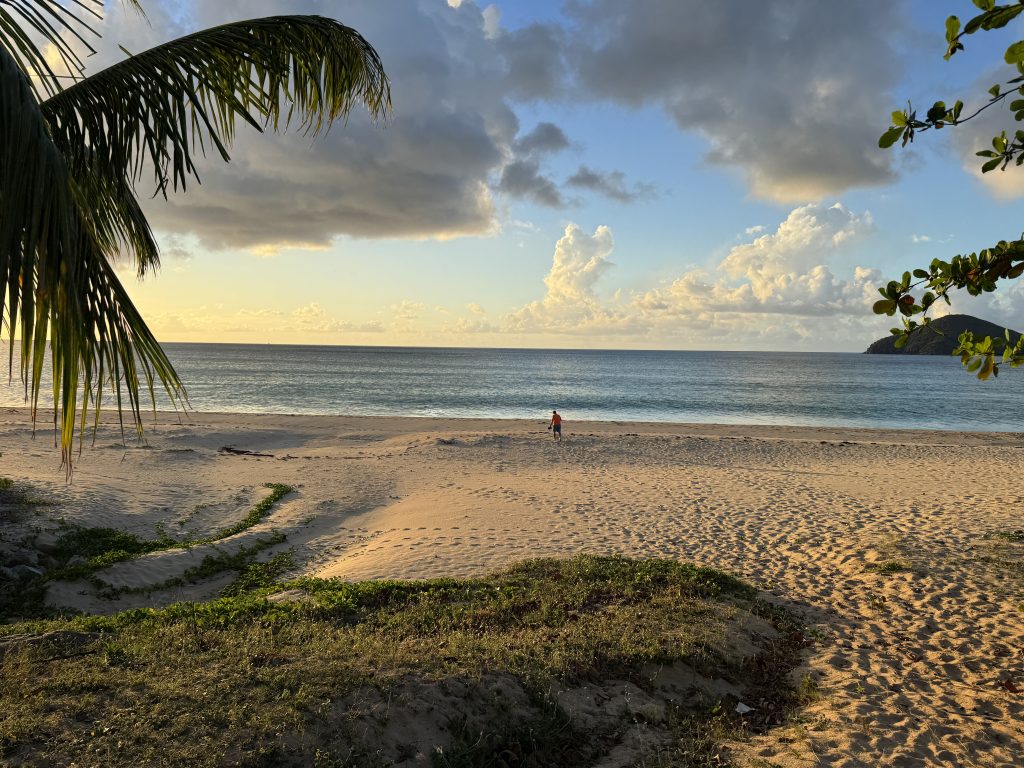
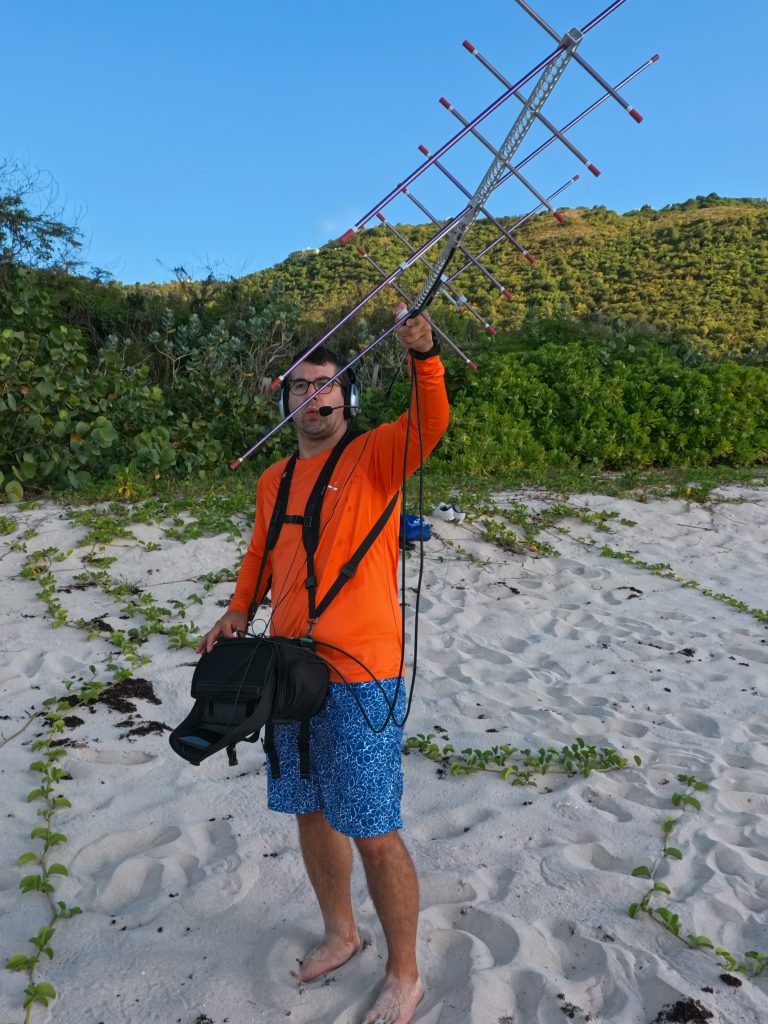
We took a break from our island QTH to venture to a beach to enjoy some sun, sand, and satellite passes. After the RS-44 pass (which was much more tame than yesterday), we went to dinner.
The plan for this evening is to keep the QSOs coming. I am working FT8 on 17 meters while I get a few things setup. Tony caught the end of a 6 meter opening. He will probably QSY to 30 meters and work some folks before we hit the hay.
Tomorrow morning will come early as we are participating in the HamSCI Meteor Scatter QSO Party. Tony will be working 6 meters and I will be on 10 meters from 4 to 7 am! We will try and be on the air until noon or so, when we need to checkout and head to the airport for our flights back to the USA. There will be one last operating update post tomorrow morning.
Good morning from Tortola! We worked into the evening last night with Tony making QSOs on 30 and 80 meters and me switching between 40 meter SSB and FT8. While bad conditions weren’t great, we did log over 400 QSOs between us.
I am starting today on 17 meters and Tony is switching between 12 meters and 6 meters. Tony made a 6 meter contact into the UK, which we hope means more openings are coming. The bands were really bad mid day yesterday and have been improving since.
The plan is to continue to work our goal bands (6, 12, 17, and 30) today and Tony has another RS-44 satellite pass planned. I’ll keep this post short so I can shift off FT8 to SSB. Hope to hear you on the bands!
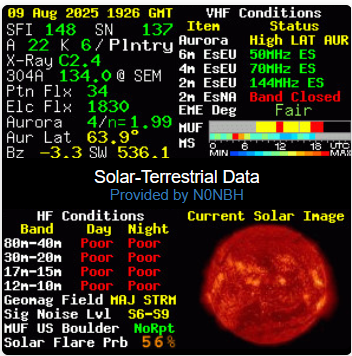
As band conditions fade in and out today with the solar storm, we have been forced to move to FT8. I made 8 SSB contacts and tried for a few hours. I was not successful on CW, with signals fading in and out faster than I (or my computer) could reliability decode.
FT8 has been up and down as well. Stations picked up this afternoon and I have had a constant stream of 3 or 4 stations hunting me on 17 meters. Tony had a crazy satellite pass on RS-44. So it has a good trip so far, just not the QSO count we were hoping for.
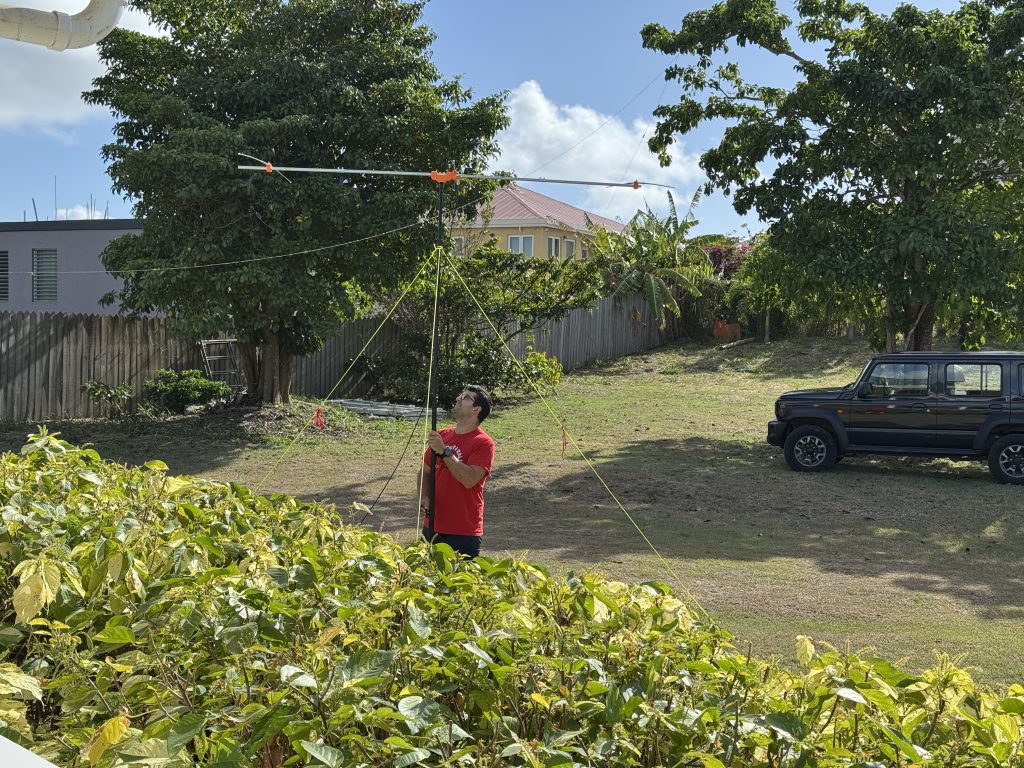
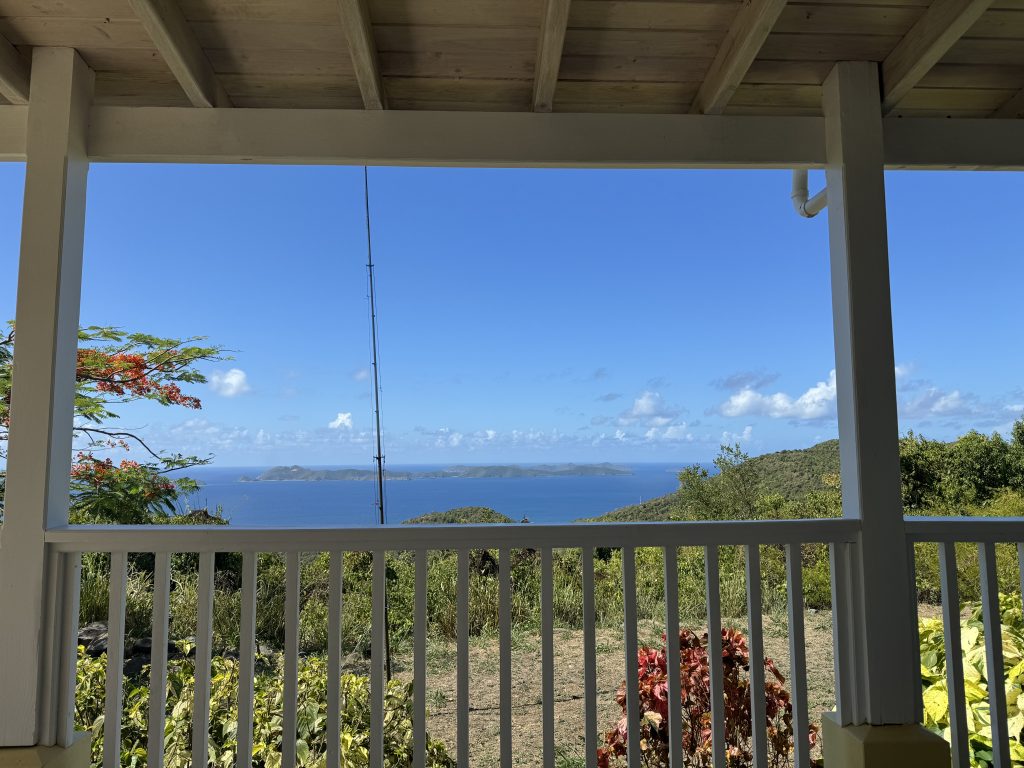
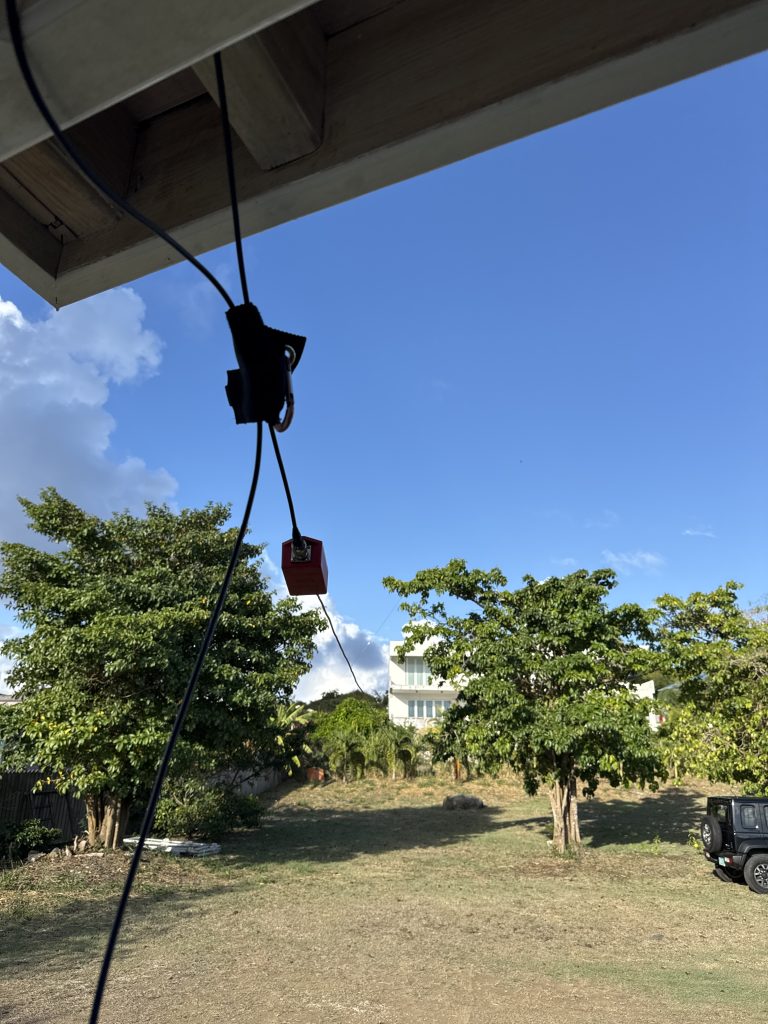
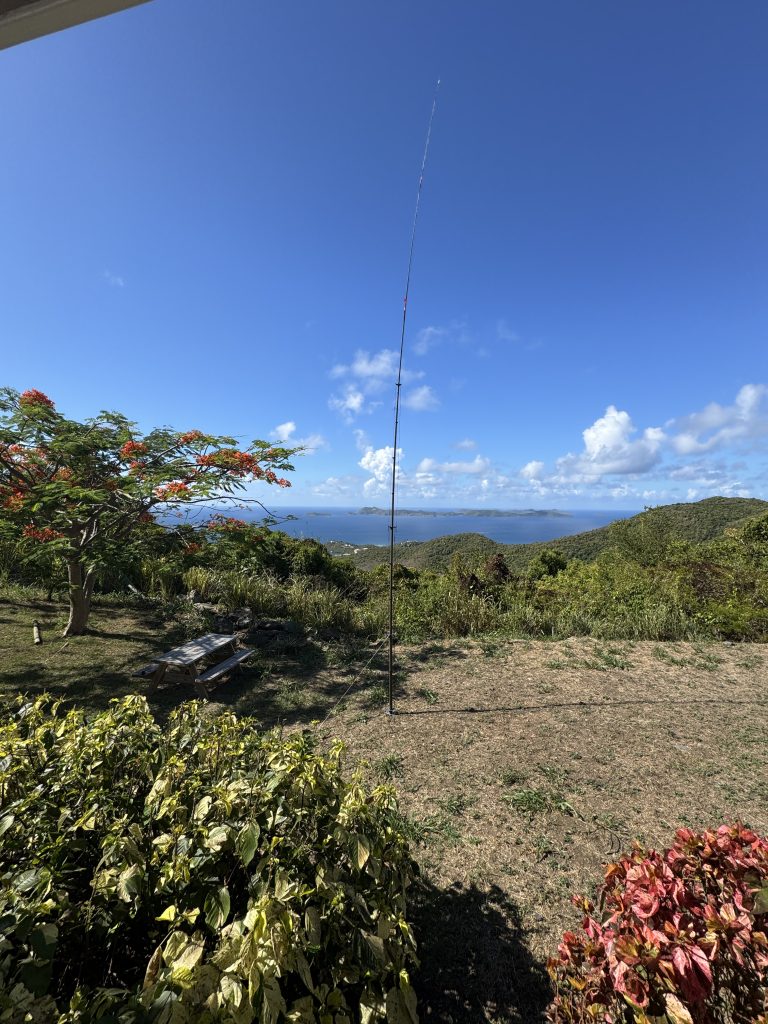
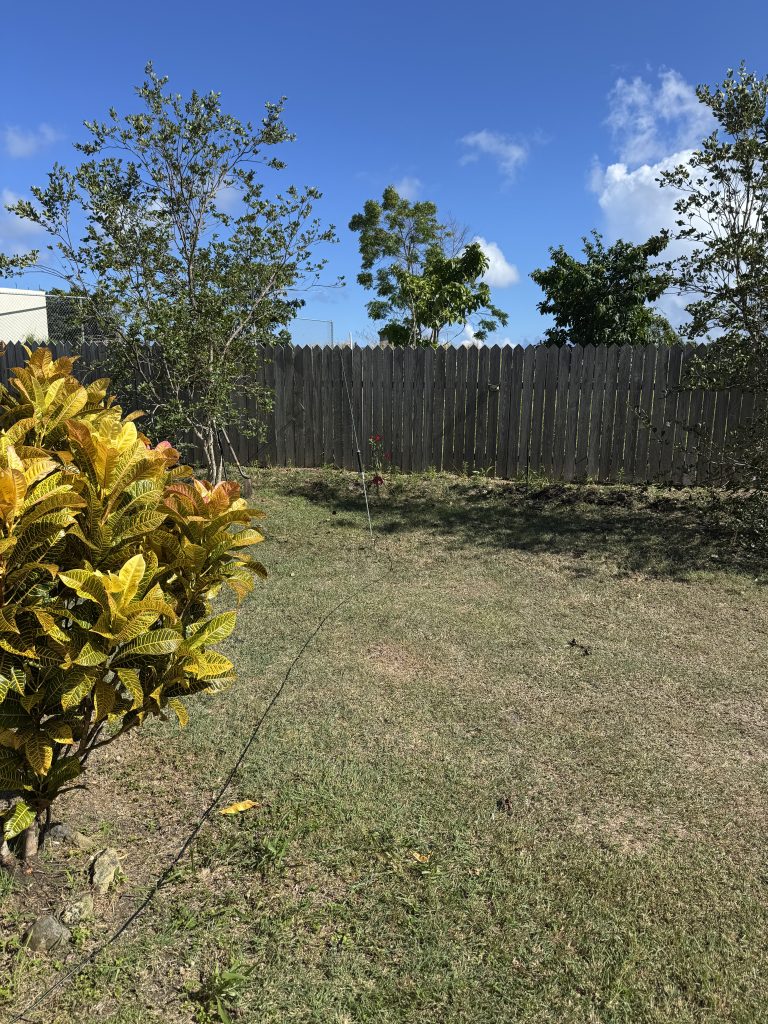
We did deploy one of our backup wire antennas as Tony’s Super Antenna vertical was okay for 10 and 12 meters, but wasn’t doing enough for any other band. The random wire into a 1:9 unun up about 20 ft (to the tree in the photo below) is working well. It tunes up on 80 and 160 meters, so might try those tonight!
Overall a pretty fun trip so far. More frequent updates on the various spotting networks and twitter!
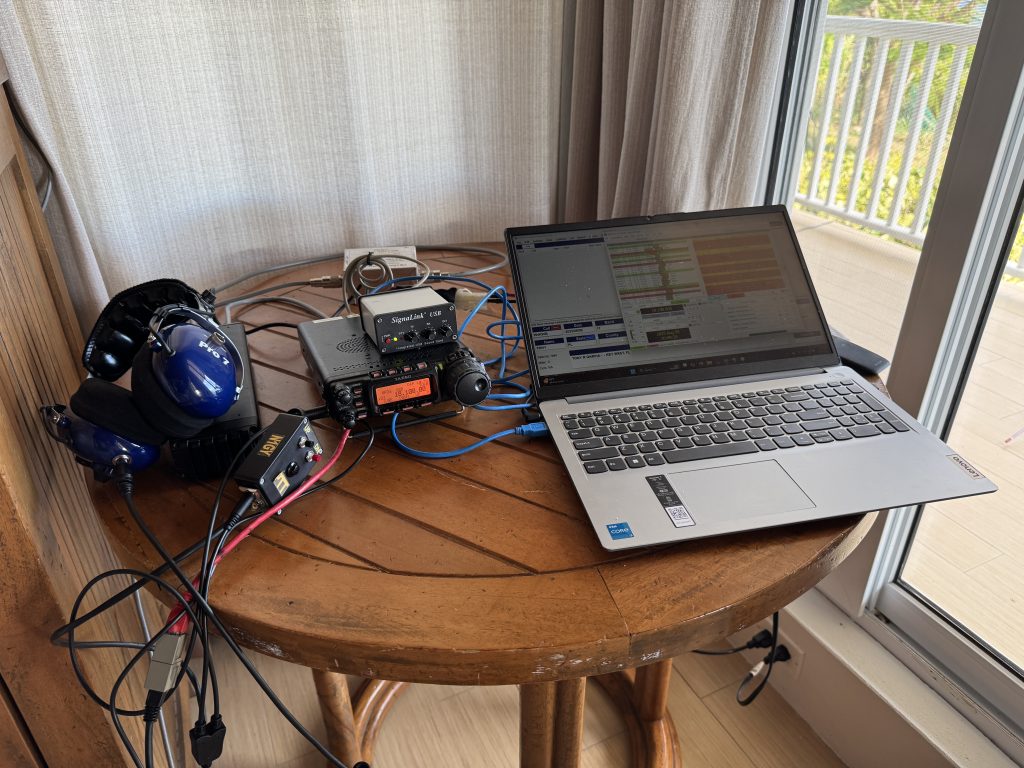
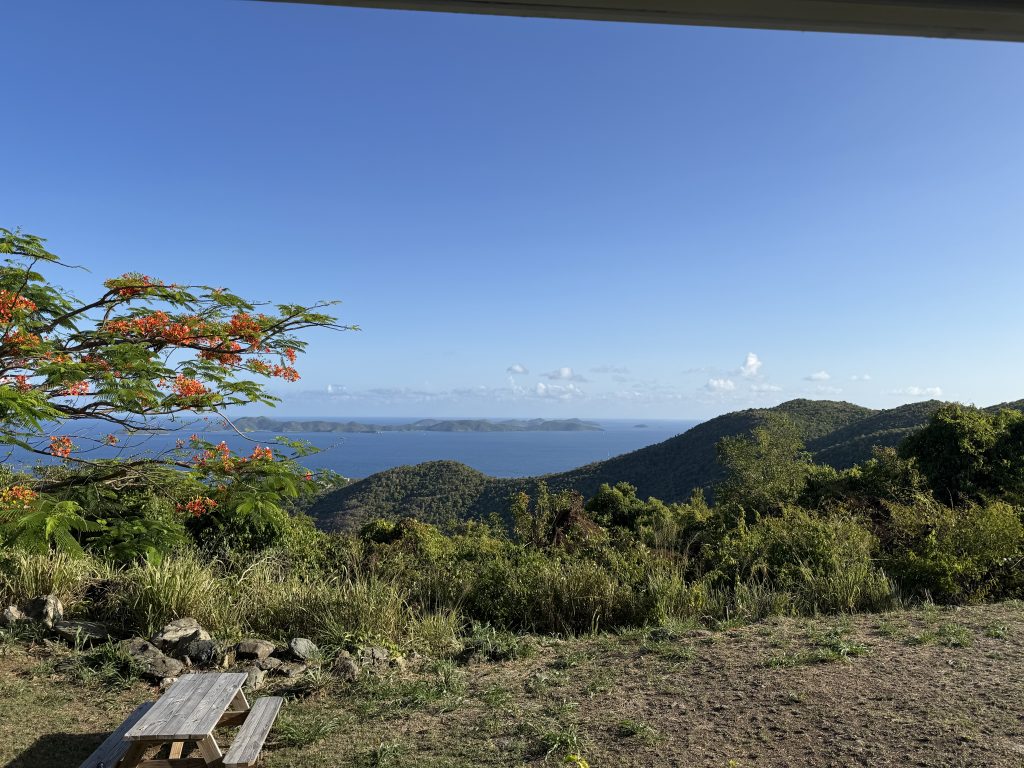
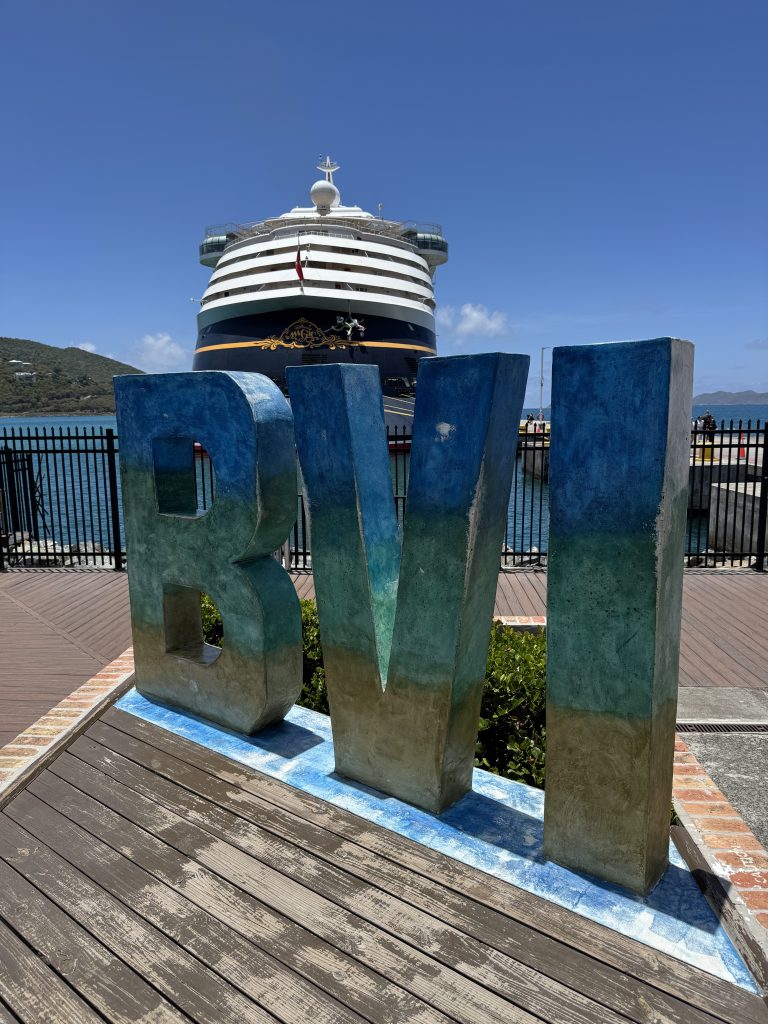
Look at that view! We have our antennas up and on the air! Tony is starting on 6 and 12 meters (checking for openings on 6 meters and prioritizing that). I am starting on 15 meters and moving to 17 meters.
For antennas I am running a DXCommander Expedition vertical antenna. It covers 10 to 40 meters. Tony is on the 6 meter beam pointed towards the USA and a super antenna.
The plan is to start on SSB for a bit and have some fun. It is a beautiful day here in Tortola. Stay tuned for more!
Today’s the day! Say tuned here and on Twitter @KK4LWR to get all the updates. Tony and I met up in Miami for the flight to Tortola. We have had wonderful time planning this trip and it’s time to get on the air.
The plan is get dinner and then get antennas up. Probably will have an earlier night to recover from traveling and then hit the bands running tomorrow morning early!
Next in the VP2V DXpedition series, let’s dig into the operational plan. After selecting Tortola, we need to figure out our operation. We land on Friday, August 8th in the afternoon and depart on Monday, August 11th in the afternoon. We want to maximize our time on the air and generate the most QSOs possible.
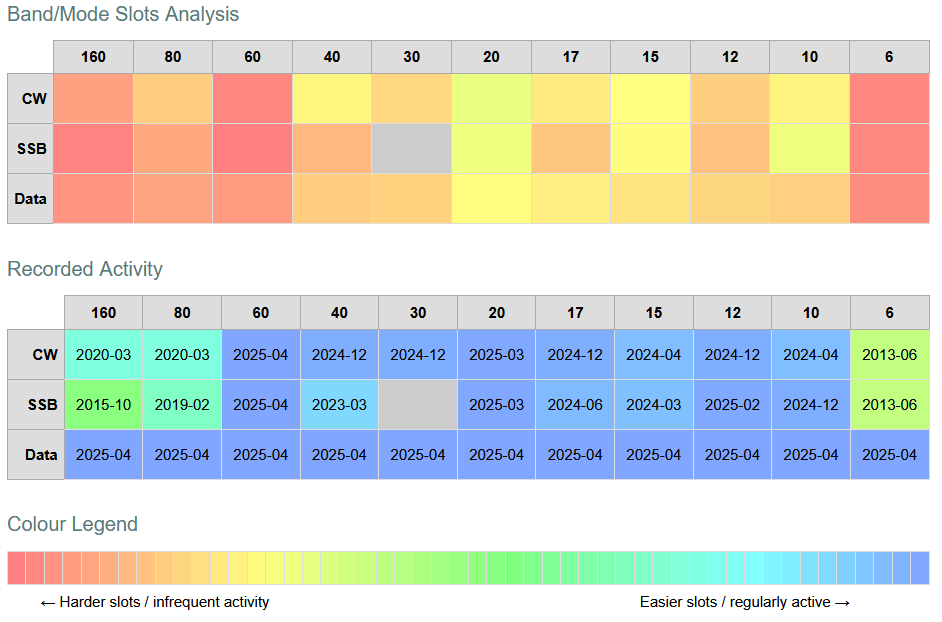
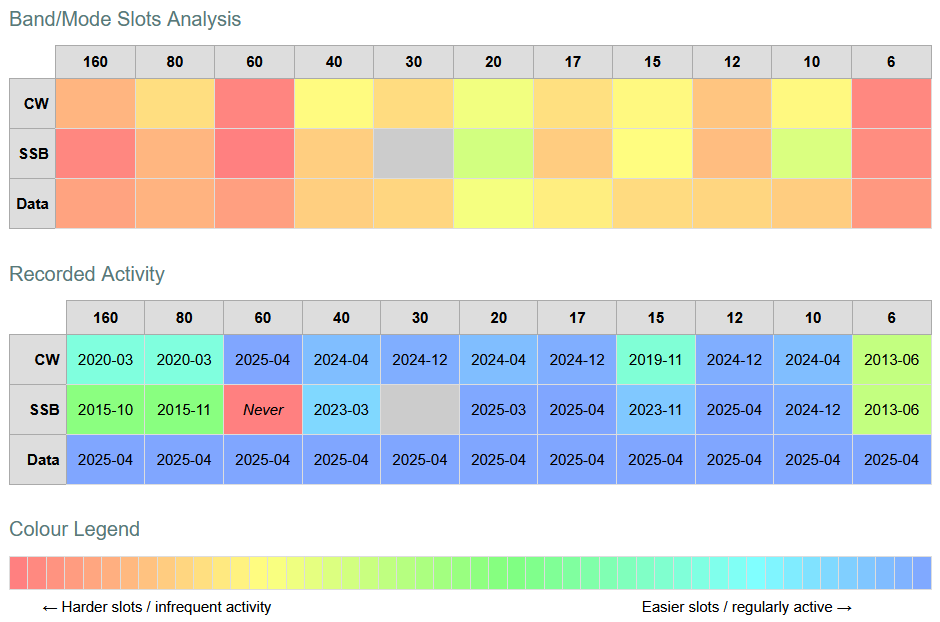
ClubLog offers the ability to analyze a DX entity for what bands and modes are in demand. It also tracks the last time it was activated. As the cover photo shows, there are some clear bands in demand. Tony and I are both confident about getting on the air on 6 meters. We both participate in VHF contests, so we feel good about 6 meters; we just need an antenna. The summer and high solar cycle noise on 160 makes the band difficult to use. It also poses an antenna challenge. 80 and 60 meters are more doable, but still remains a challenge.
VP2V DXCC Analysis for North America
Bands 40 to 10 meters are easy for us. We have multiple antennas and can get on the air. Globally, in that range, the WARC bands (12, 17, and 30 meters), seem to be in more demand. 15 meters and 40 meters SSB are also, strangely, seems in demand.
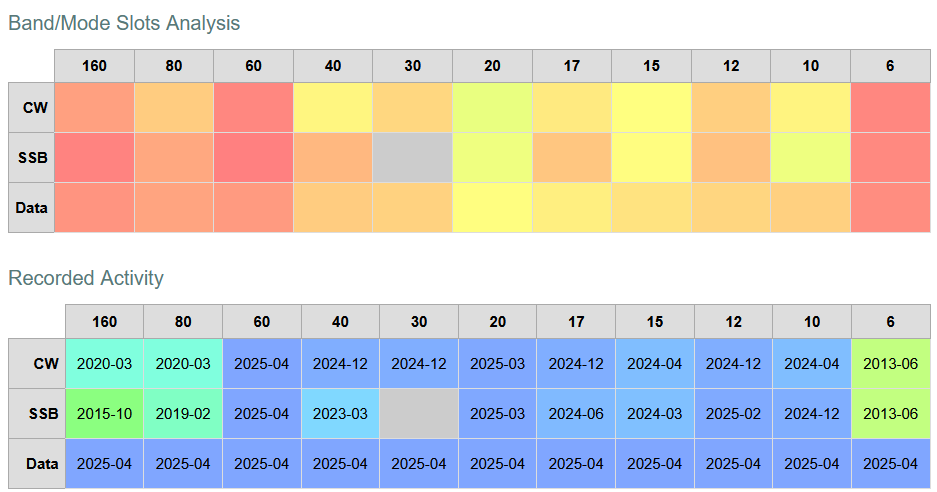
VP2V DXCC Analysis for Europe
As we move around the world, VP2V gets more in demand, especially in Asia. So this is looking like a good trip. We plan to follow propagation as it appears there is lots of needed bands.
I’ll end this post here for now as we could go on forever analyzing QSO history. In fact I’m on Tortola right while writing this post, so need to go visit the beach with my wife and daughter. Tune in next week to learn about our equipment.
Welcome to the first post in a series taking a look at how Tony and I planned and prepared for our VP2V DXpedition in August. We are hardly experts, but this serves as a bit of documentation (and forum for feedback) to capture what we learned. For this first post, let’s dive into how we ended up with Tortola and the British Virgin Islands.
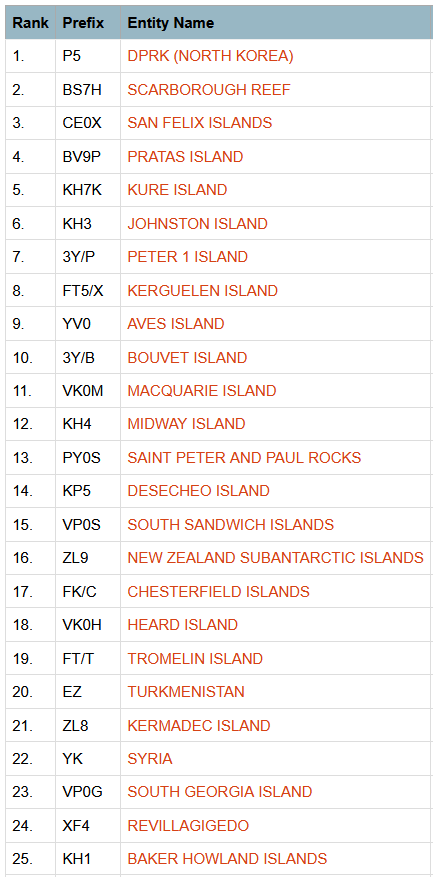
Our search began with ClubLog’s Most-Wanted list. ClubLog looks at all the QSOs uploaded and compares that with all the available country prefixes. Many of the top locations are difficult to arrange travel. With that in mind, narrowed the list to a few key contenders, C6A – Bahamas, VP2V – British Virgin Islands, and PJ7 – Sint Maarten.
With a short list, we began some research on licensing and travel plans. Both Tony and I have been to the Bahamas a lot. We looked at a bunch of islands: Nassau, Bimini, Grand Bahama. Ultimately we have been to the Bahamas a lot and there are plenty of travel options. We also have both gotten our Bahamian licenses in the past for various. The downside, is that the Bahamas is VERY popular and finding a place to operate is difficult.
Sint Maarten is interesting due to the nature of the island. However, we both lack a lot of experience with the island. Aside from a few cruises years ago, we haven’t been to the island recently. There does seem to be somewhat consistent activity every month or so on the island, according to ClubLog. This makes it less appealing for us, since it is rare, but not always on the air.
The British Virgin Islands are also interesting. There are several islands that make up the BVIs with Tortola being the capital. Both Tony and I have been to the island. I’ve been to the island recently and in fact will be there a week before the DXpedition. While it has been recently activated (which decreased its rank), it is fairly infrequent for folks to get on the air.
Ultimately looking at costs of travel and ClubLog rank and activity, we settled on Tortola in the British Virgin Islands. The island has good infrastructure in terms of places to stay, provisions, an international airport, and roadways. The island also has some good elevation to aid in making contacts. So with the location finalized, time to start planning.
I love the Caribbean. Living in Florida it is a quick trip to any of the islands. From the amazing diving to days on the beach, its the perfect place to kick back. Naturally when it comes time to pick somewhere to go for my first DXpedition, the Caribbean is at the top of the list.
Looking at ClubLog, the British Virgin Islands are ranked 138 and are a beautiful area. I’ve visited many times on cruises (the source of all the photos in this post). I’ve gone diving, I’ve spent time on the beach, but I haven’t gotten on the radio!
This trip will be my first time flying into the island. We have formulated an operating plan and even created a custom antenna to get us on 6 meters! More on that in another post. Until then, you can check out our plans at the dedicated page: KK4LWR.com/VP2V.